Selected projects
-
Skjlls.com
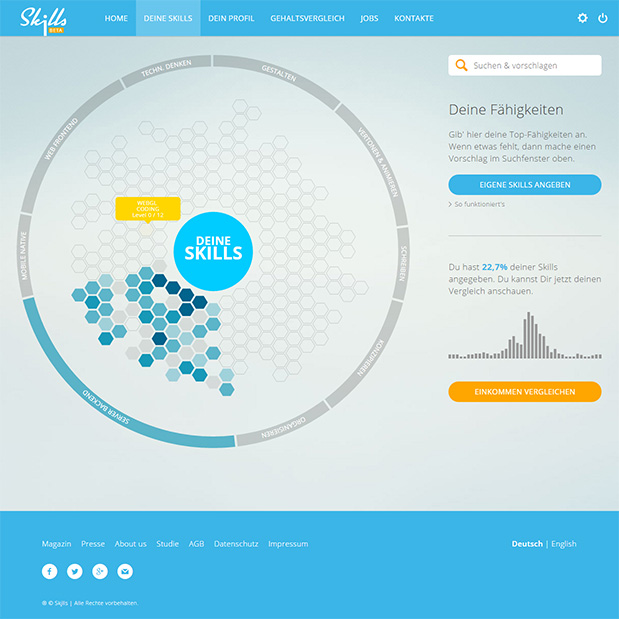
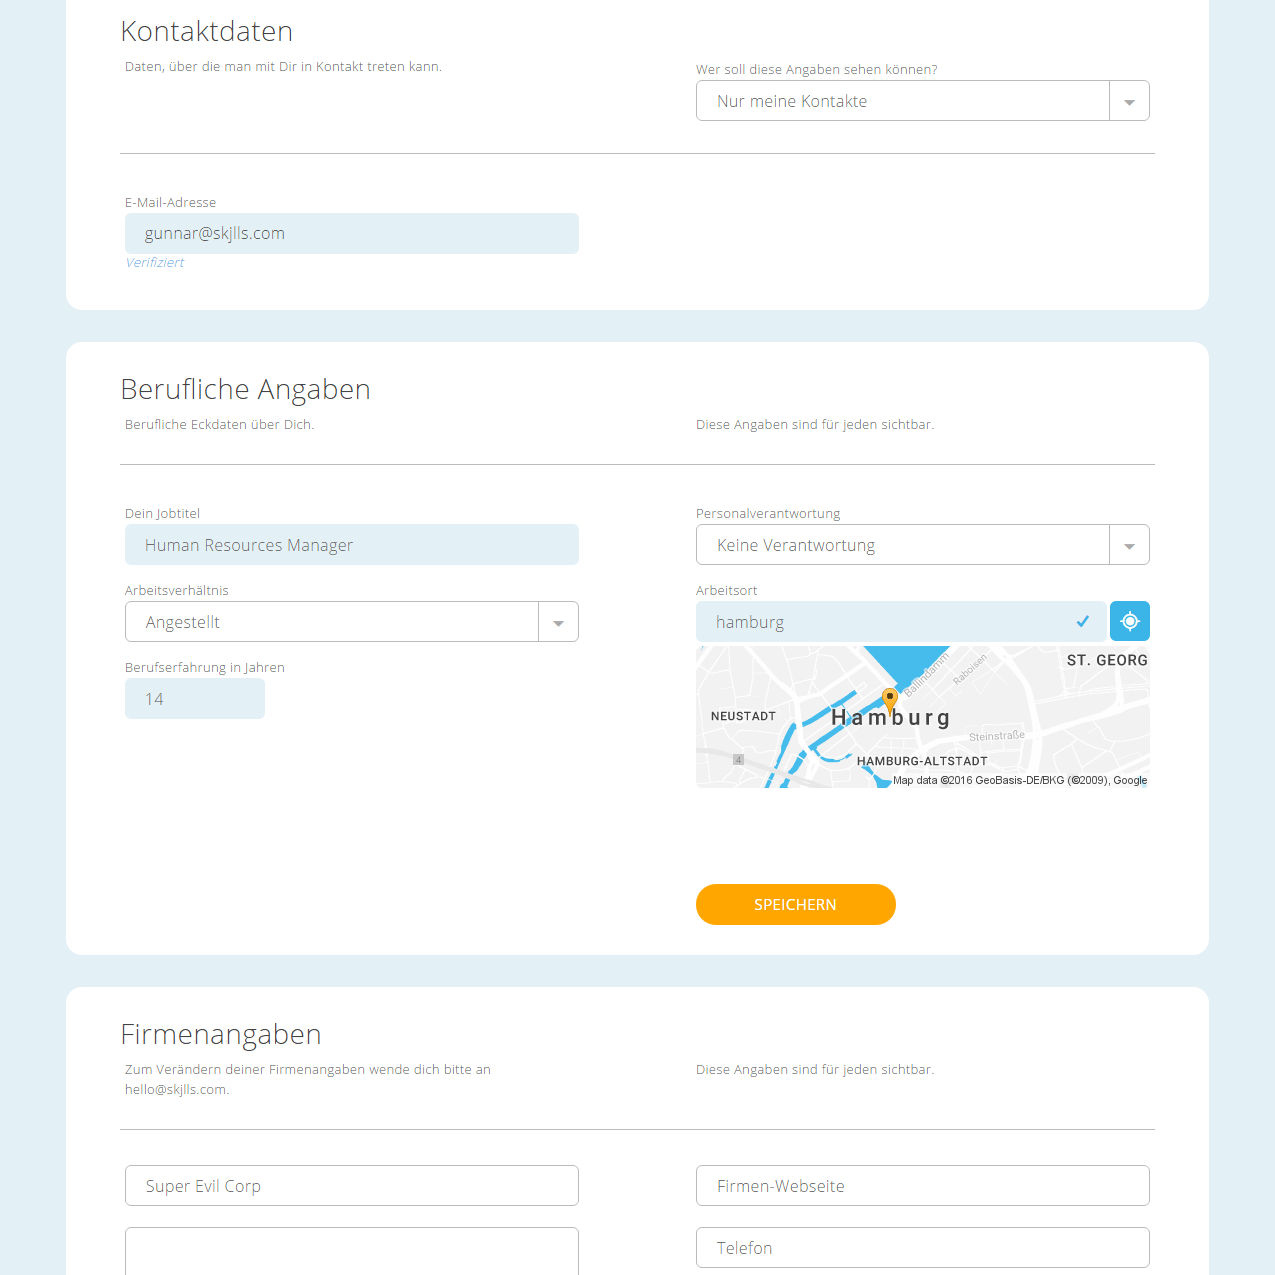
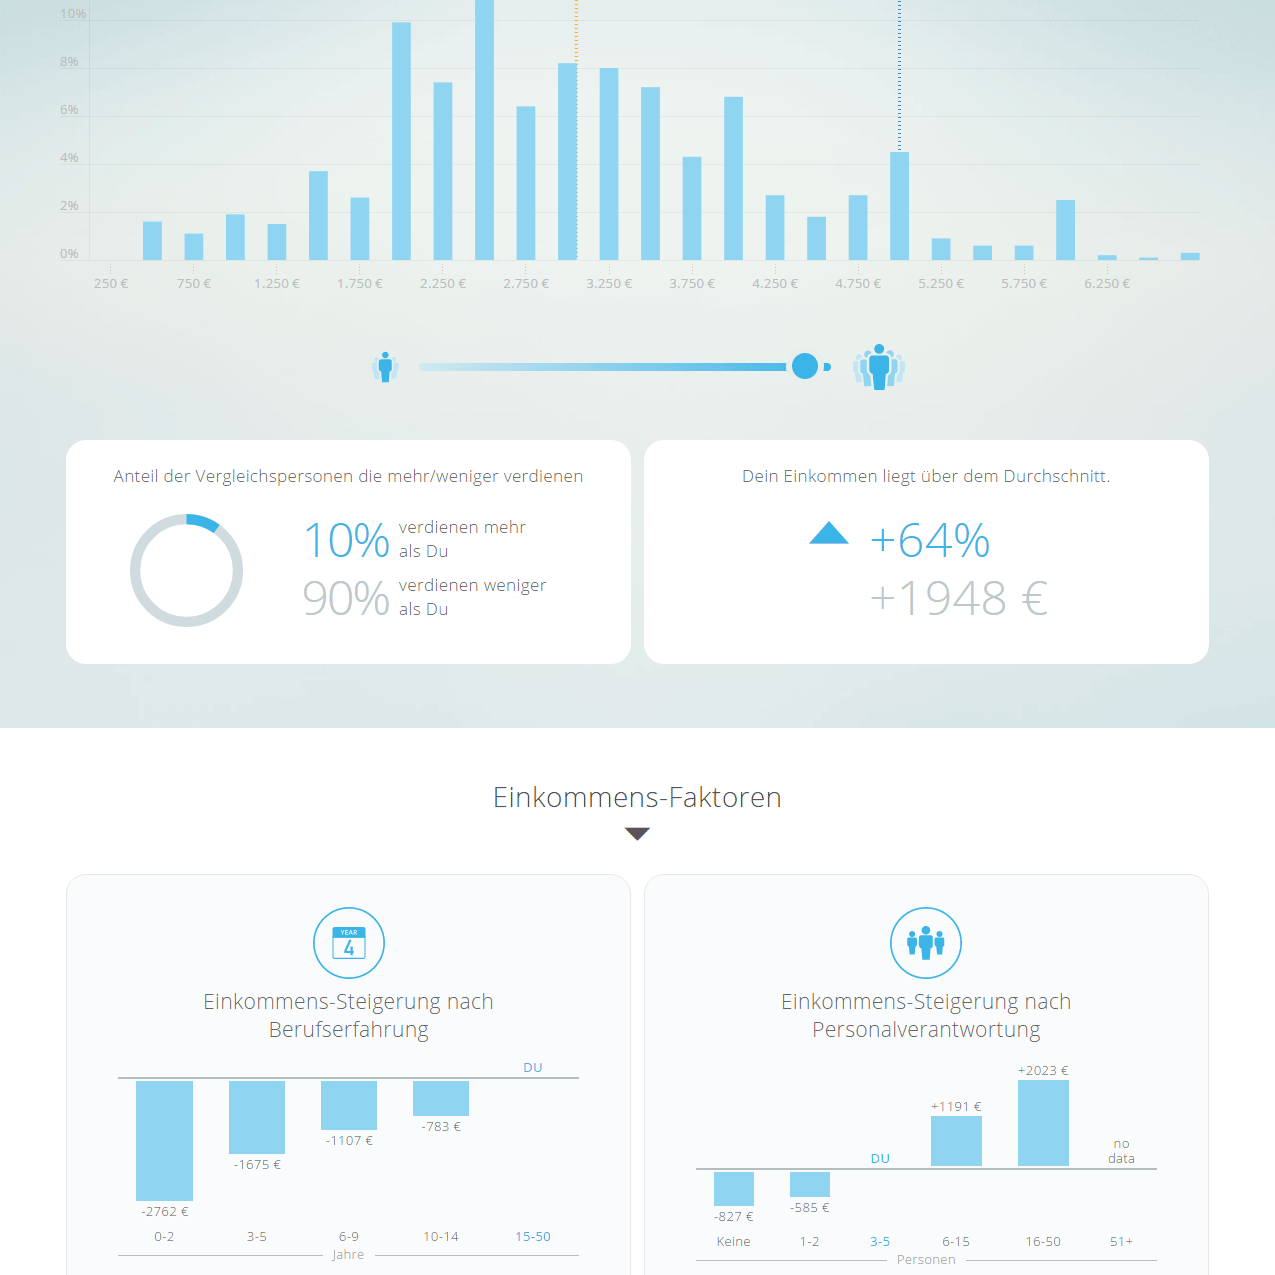
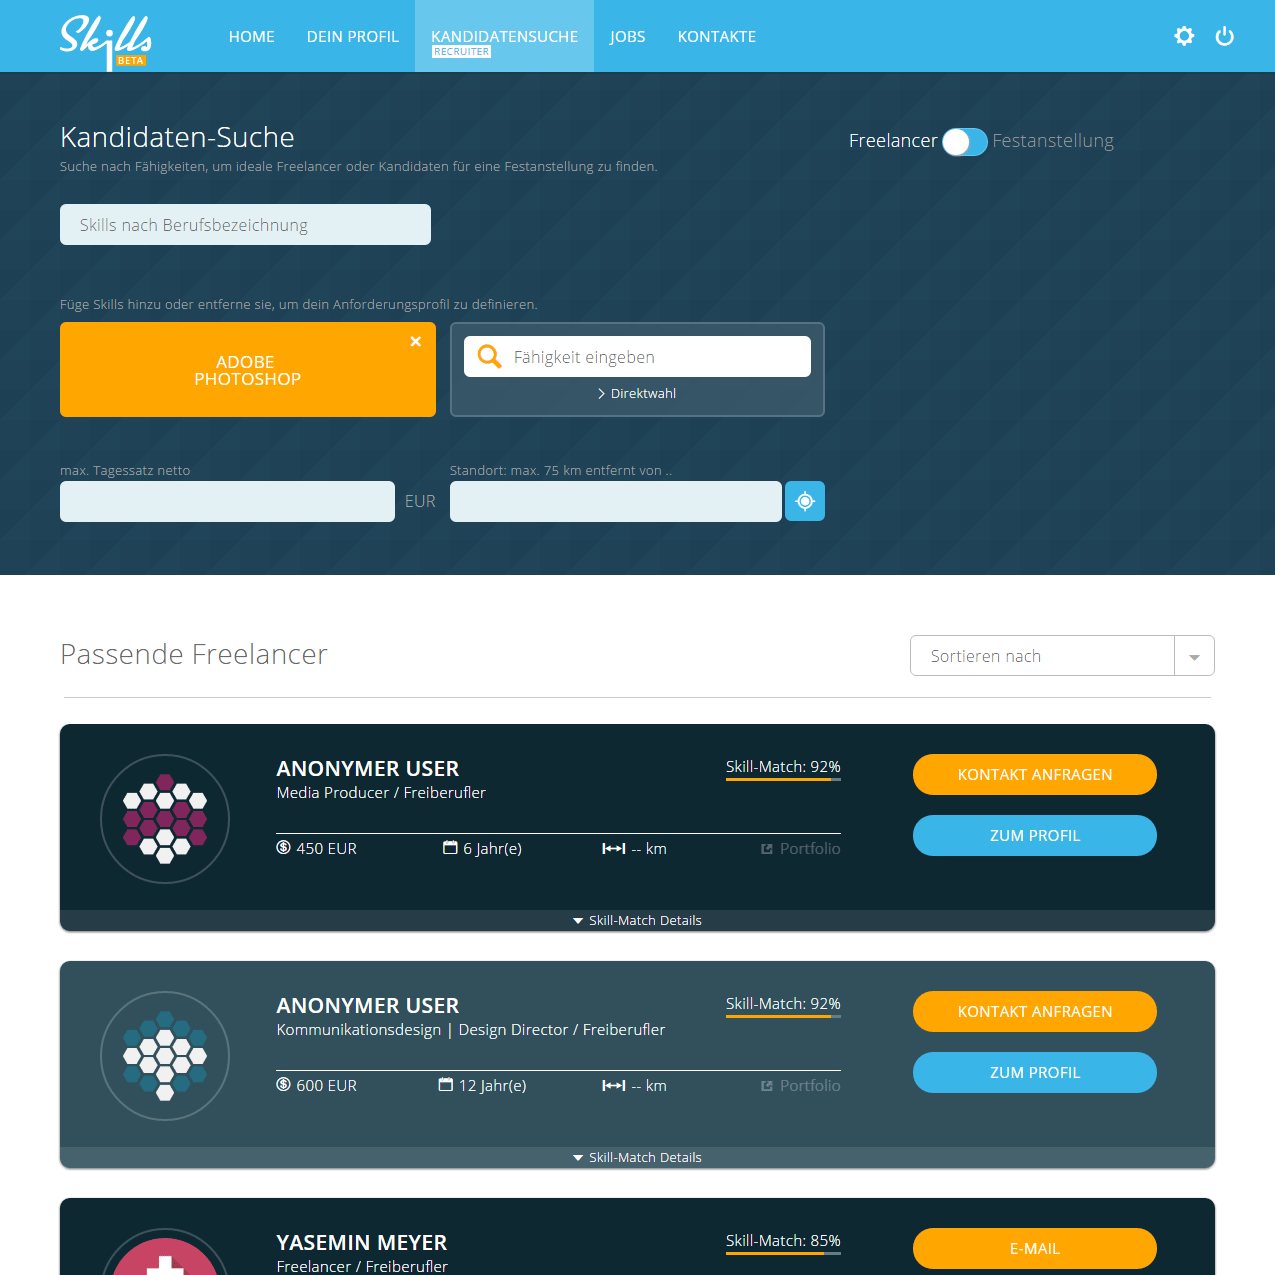
Client Startup From 2014 until the end of 2016 I was a co-founder and frontend developer of skjlls.com. The platform started out as a salary comparison and later expanded into a search engine for freelancers and employees. I was solely responsible for the frontend development. Used technologies were sass, react, hexo, node.js, d3 and others.
-
VW configurator
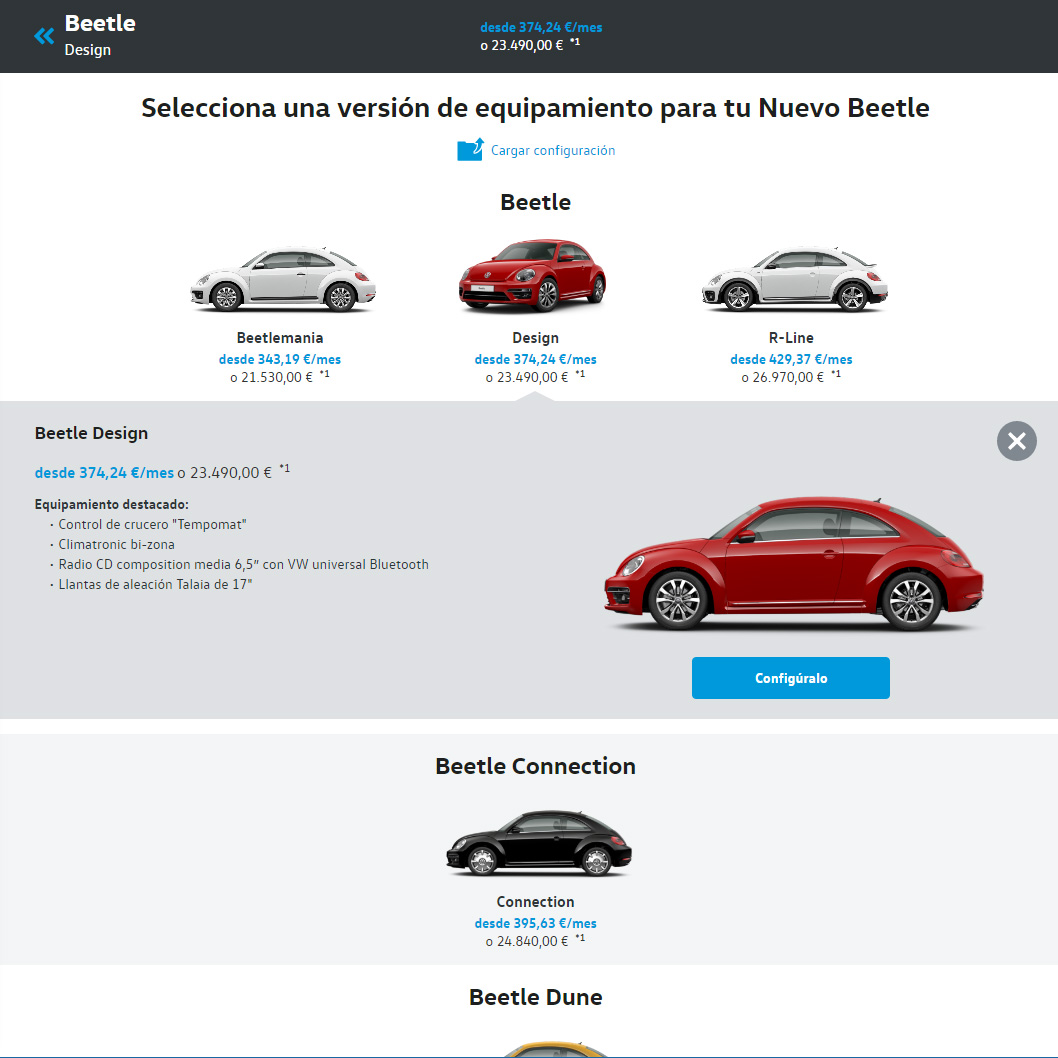
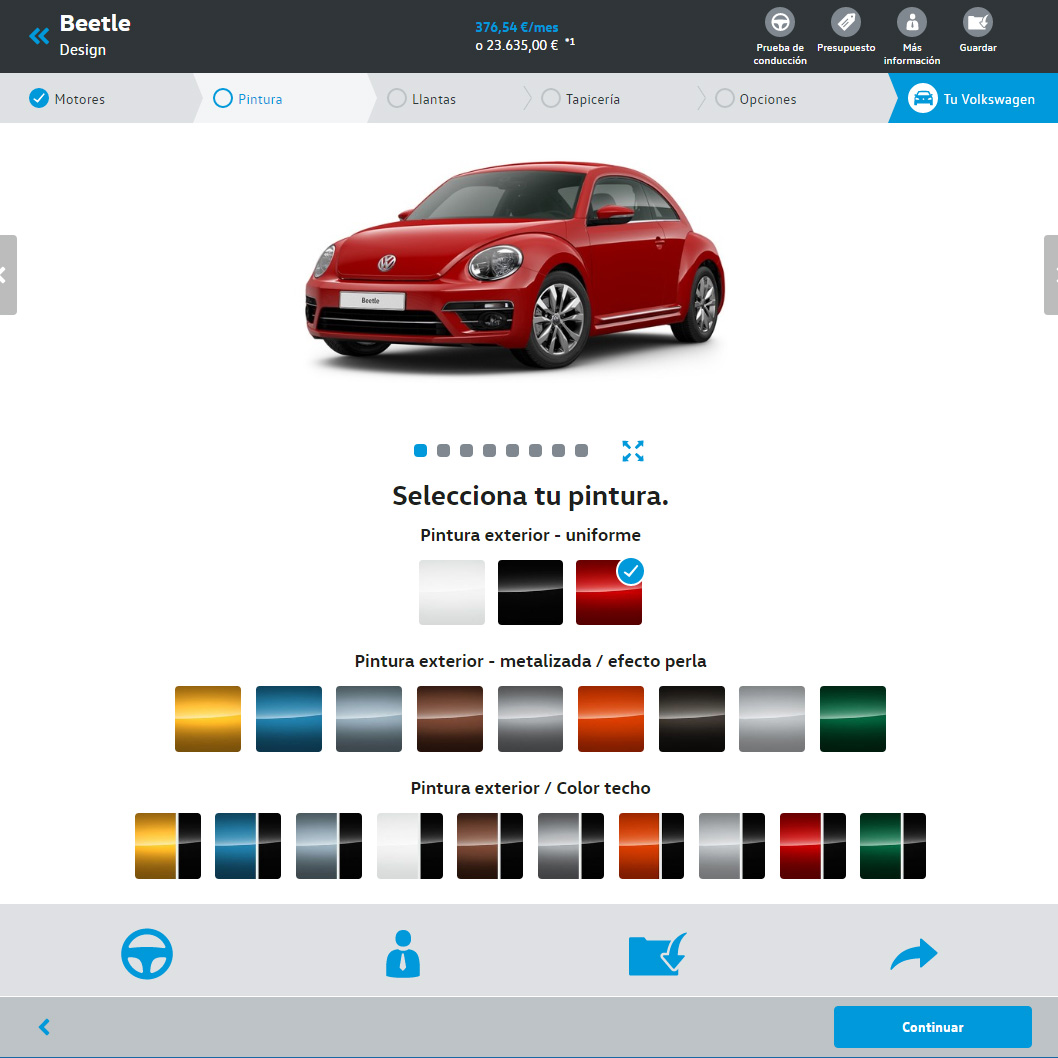
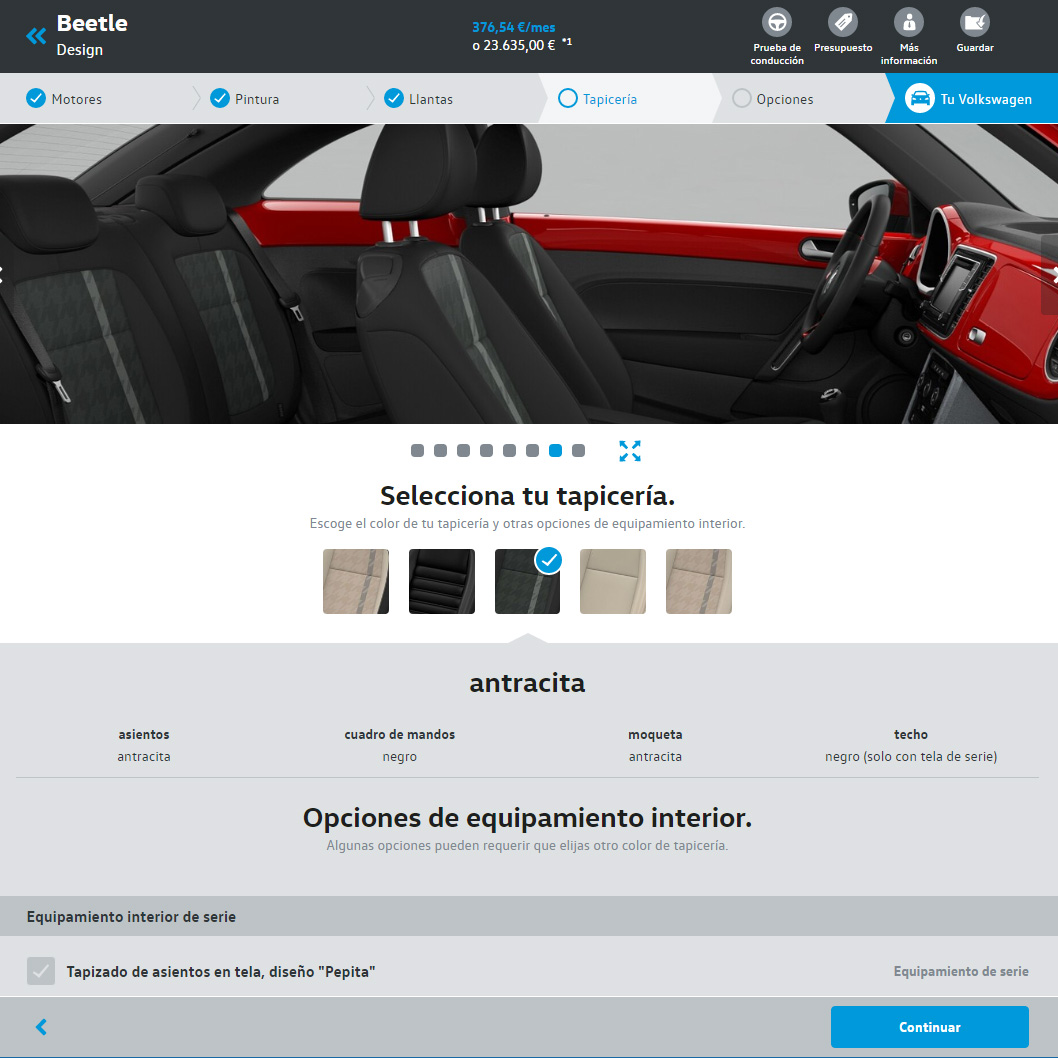

Client Volkswagen Agency SinnerSchrader In a scrum-driven team I helped build the online configurator for Volkswagen for the better part of 2016. Part of the job was building react components, writing app logic with the help of redux, unit tests, acceptance tests with selenium and doing code reviews.
-
VW Golf 7
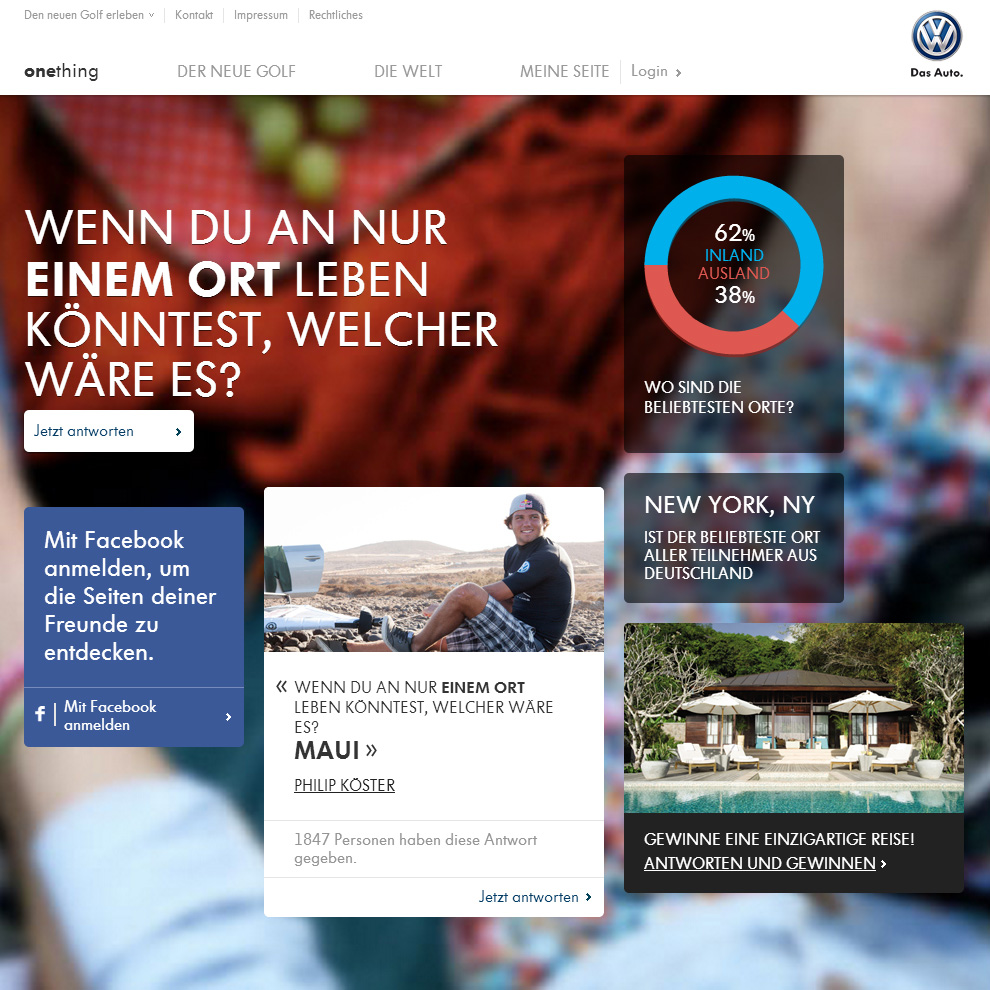
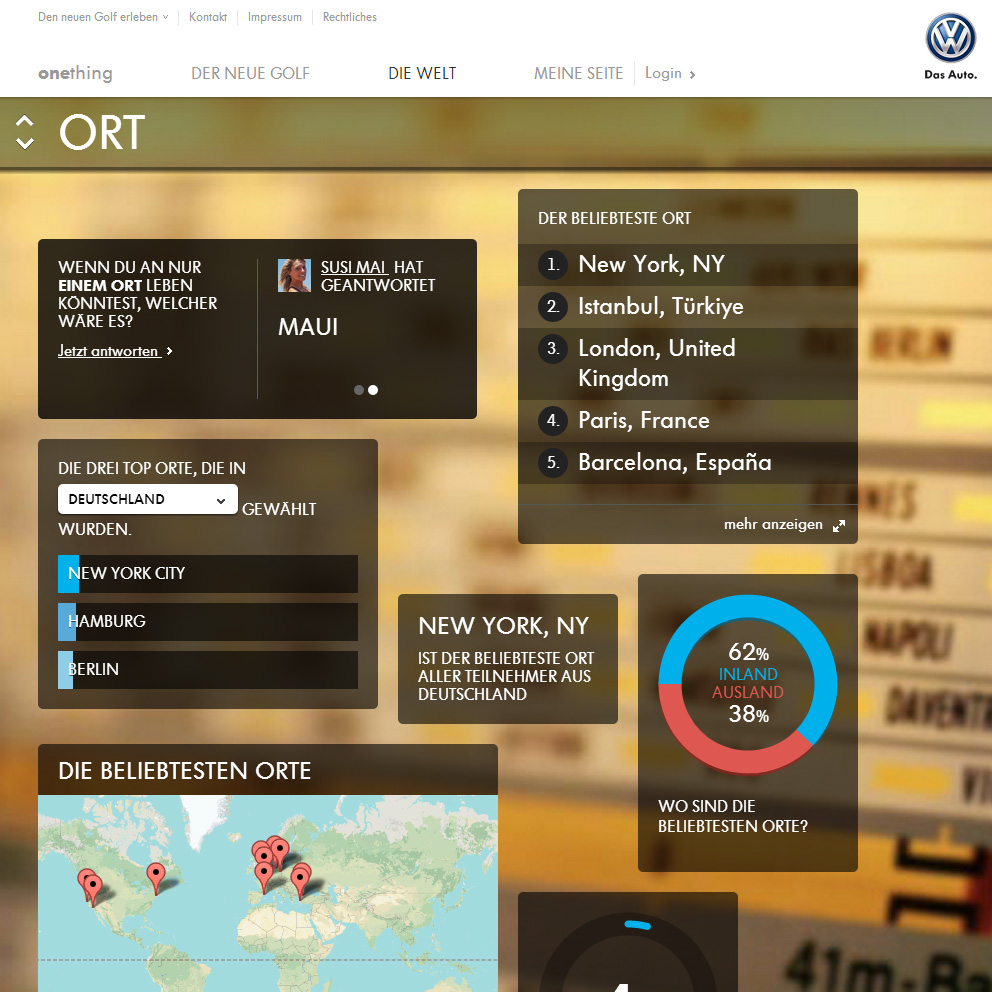
Client Volkswagen Agency Tribal DDB In a team of eight developers I was the lead JavaScript developer for the online community onething.com. On the site, users could register profiles, answer polls about different aspects of life and get a multitude of statistics about what others answered.
-
Brainbattle
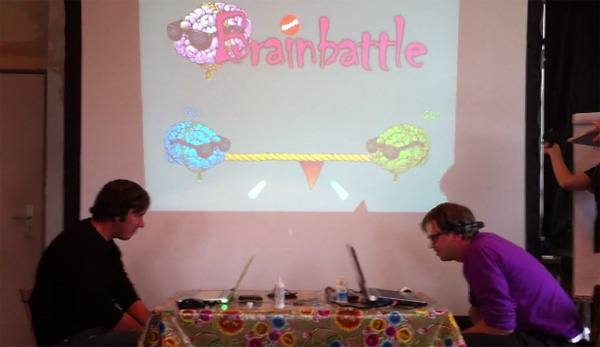
Client GoodSchool I developed a „brain tug-of-war“ game for the GoodSchool. The opponents wear an EEG sensor device. These devices from emotiv are capable of recognizing the minimal voltages in the brain and map the statuses to certain actions. I built a multiplayer-server, which controlled the game and the communication between the two game PCs, as well as an application in flash, that displays the game flow.
-
Lego builders of infinity
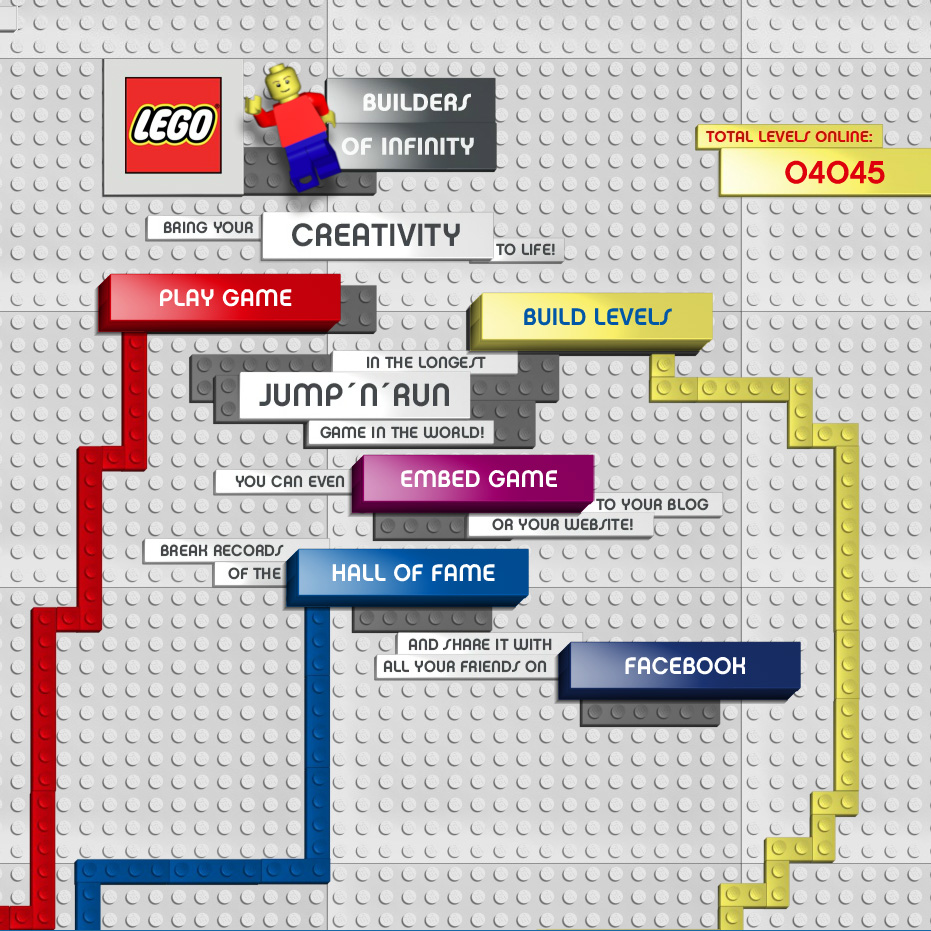
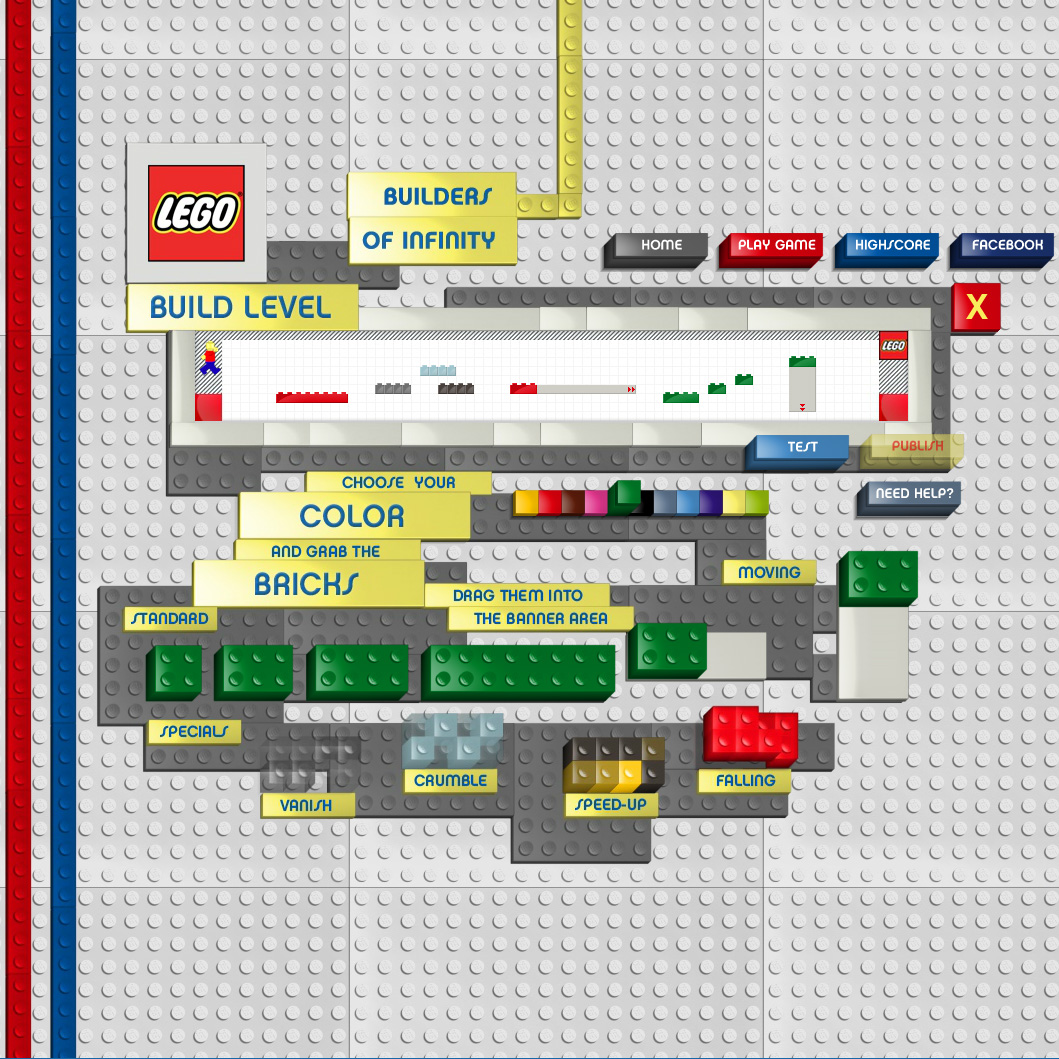
Client Lego Agency Plan.net Hamburg Online jump ‘n run game with level editor, implemented with Adobe Flash. The game has won multiple awards, including a silver lion in cannes among others. I was responsible for the development of the game.